Reduce on-site support costs by logging data with Particle’s Device Ledger
Gain remote access to detailed logging and device metadata, enabling faster troubleshooting and resolution when field issues arise.

Ready to build your IoT product?
Create your Particle account and get access to:
- Discounted IoT devices
- Device management console
- Developer guides and resources
Particle Ledger
Imagine that your company has deployed thousands of connected devices, and a critical issue arises with a key customer. Resolving it requires sending a technician to manually retrieve logs and metadata — a costly, time-consuming process that unfortunately grows with your fleet.
Previously, debugging and troubleshooting started with the use of Particle’s built-in SerialLogHandler. The SerialLogHandler captures essential data about your application using serial over USB interface. This data can include comprehensive connectivity logs, detailed low-level Device OS trace data, and even application specific information. While powerful, this approach still required an on-site technician to access the data.
Enter Particle’s Device Ledger. This solution transforms remote device diagnostics by securely streaming SerialLogHandler data directly to the Particle Cloud. With this cloud-based access, your team can rapidly diagnose and resolve issues without sending someone on-site. The result? Reduced operational costs, faster troubleshooting, and a seamless, scalable approach to maintaining device performance across your entire fleet.

Ledger setup
In this post we’ll use two different Ledgers, one for saving the remote log from a device and one for configuring the logging level. Technically only the one Ledger for the remote log is required, but it is useful to use Ledger to remotely change the behavior of devices you are troubleshooting. If you choose to only use the Ledger for the remote log, you will need to hardcode the configuration values in your firmware.
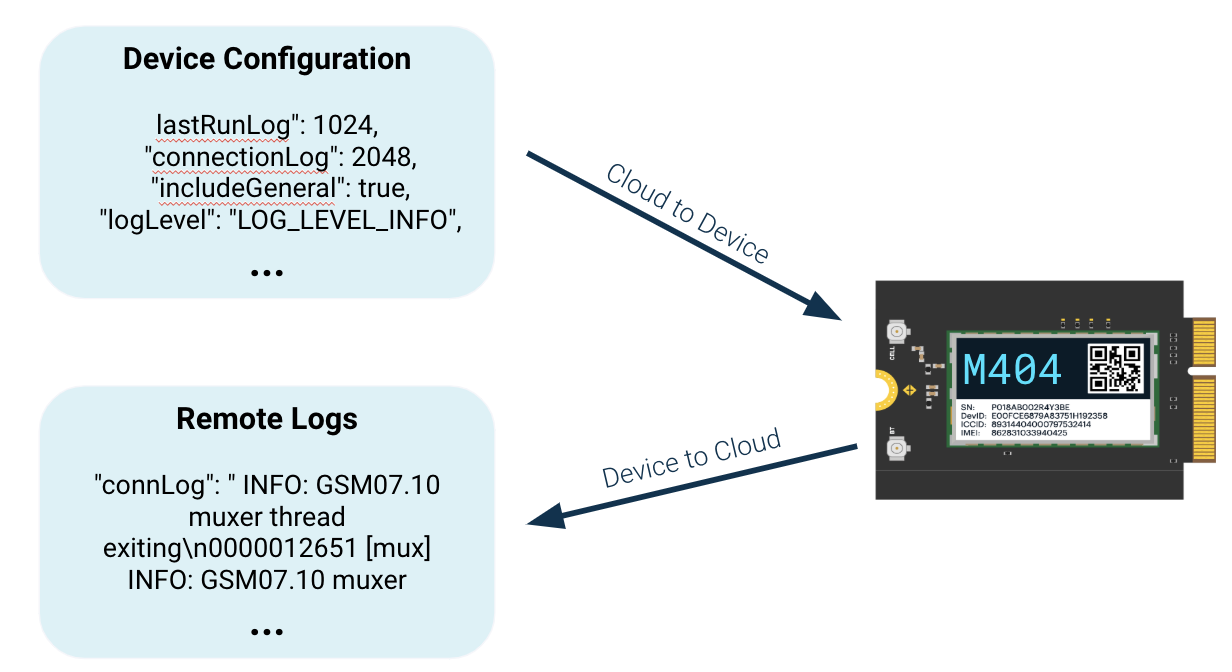
To start, we need to create a Device to Cloud Ledger in the Cloud. This is where the actual logs from the device will be stored. In the Particle Console, navigate to Ledger under Cloud Services, create a new Ledger, and select Device to Cloud Ledger. Press Start now. Then you want to name your Ledger. For the sake of this post I named the Ledger device-logging. Press Save.

Next, you will also want to create a Cloud to Device Ledger and this can be used to change parameters on the device, like log level, frequency, filters, etc. This is extremely useful as the goal is to not have to interact with the device locally. For the sake of this post I named the Ledger device-config and I set the scope to be at the product level. Press Save.
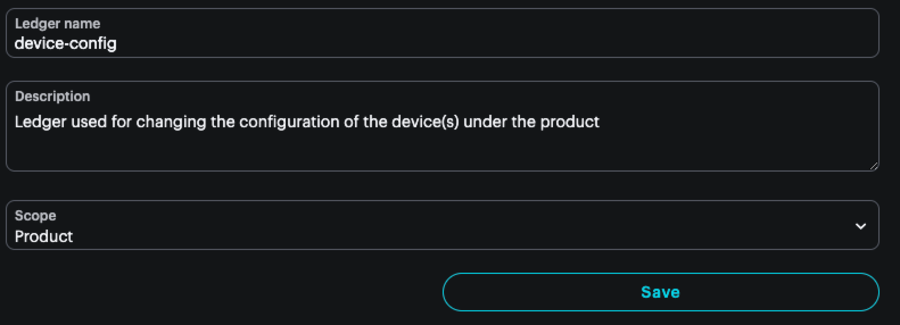
If you are dealing with multiple devices, it is best practice to create two Cloud to Device Ledgers, one for the product default configuration, scoped at the product level, and one scoped at the device level. The device level Ledger can then be used to adjust just the device you are troubleshooting without affecting the rest of your devices under that product.
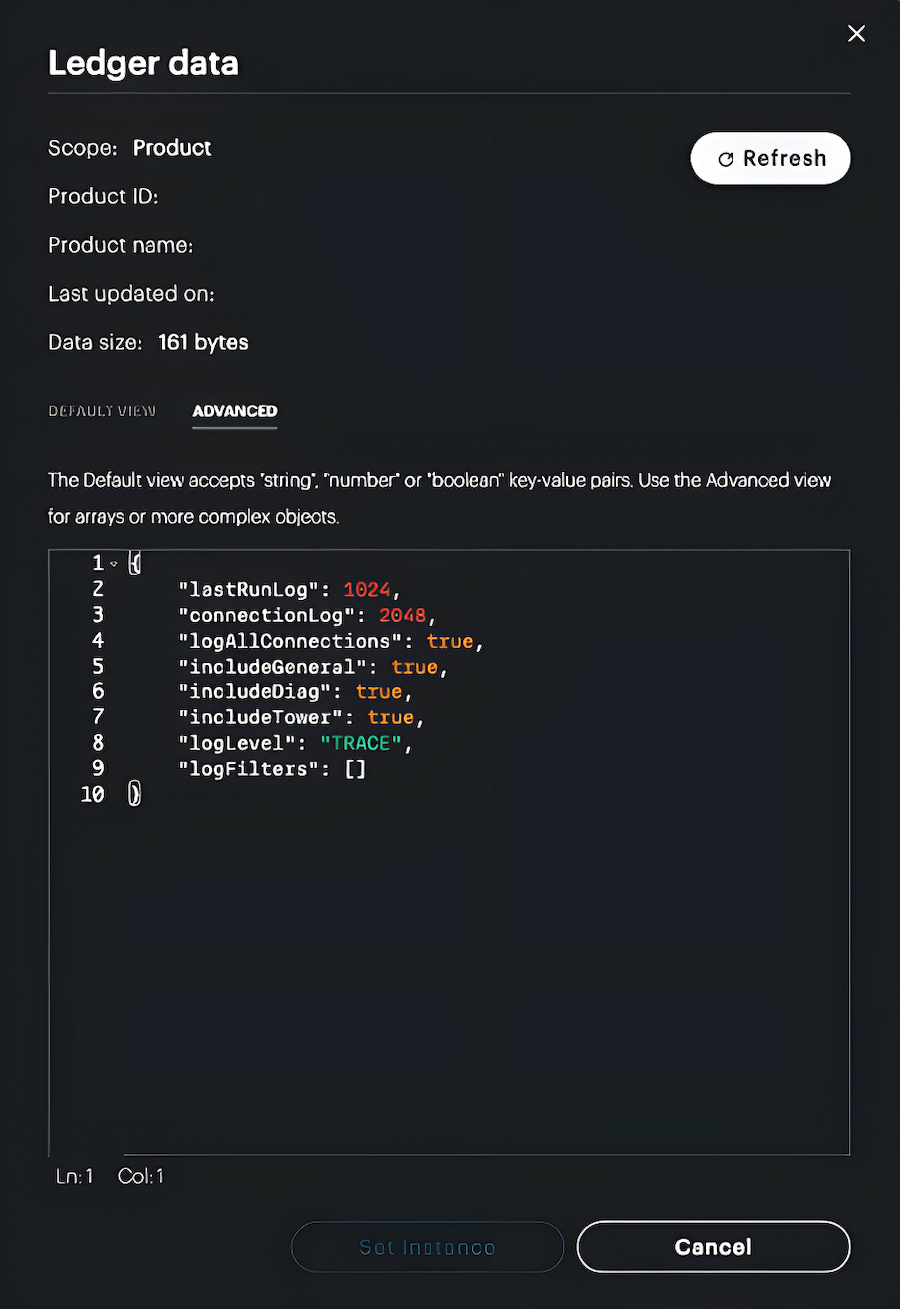
Under the device-config Ledger, we then want to create a new instance and set the configuration for the device. Navigate to the Instances tab and Create a new instance using the button. Navigate to the Advanced tab and paste the following configuration into the box and press Create Instance.
{
    "lastRunLog": 1024,
    "connectionLog": 2048,
    "logAllConnections": true,
    "includeGeneral": true,
    "includeDiag": true,
    "includeTower": true,
    "logLevel": "TRACE",
    "logFilters": []
}
Firmware
This example uses simple firmware to capture a low-level log that prior to Ledger would require human intervention to capture the log over Serial. The firmware is the same firmware as found in this document, but with minor tweaks to the Ledger names. Also this firmware leverages the DeviceInfoLedger library which handles the complexities of capturing a remote log.
In order to have access to the Ledger firmware API, you must be running on Device OS greater than or equal to 6.1.0. This firmware was built running on OS 6.2.1
The full firmware example can be downloaded here.
// Include Particle Device OS APIs
#include "Particle.h"

// inlcude library APIs
#include "DeviceInfoLedger.h"

// Let Device OS manage the connection to the Particle Cloud
SYSTEM_MODE(SEMI_AUTOMATIC);

// Run the application and system concurrently in separate threads
SYSTEM_THREAD(ENABLED);   //not required for OS >=6.2.x

// Show system, cloud connectivity, and application logs over USB
// View logs with CLI using 'particle serial monitor --follow'
SerialLogHandler logHandler(LOG_LEVEL_INFO);

// Used for retaining the last log
retained uint8_t retainedLogs[2048];

// setup() runs once, when the device is first turned on
void setup() {
  // Put initialization like pinMode and begin functions here

  waitFor(Serial.isConnected, 10000);   //waits for serial port for specified time, handy for seeing early log messages

    // This sets up remote configuration
    DeviceConfigLedger::instance()
        .withConfigDefaultLedgerName("device-config")
        .setup();

    // This sets up the device information in ledger
    DeviceInfoLedger::instance()
        .withInfoLedgerName("device-logging")
        .withRetainedBuffer(retainedLogs, sizeof(retainedLogs))
        .setup();

    // Using SYSTEM_MODE(SEMI_AUTOMATIC) and calling Particle.connect() after calling setup() for DeviceInfoLedger
    // is recommended to avoid getting new connection information in the last run log.
    Particle.connect();

}

// loop() runs over and over again, as quickly as it can execute.
void loop() {
  // The core of your code will likely live here.

  // Example: Publish event to cloud every 10 seconds. Uncomment the next 3 lines to try it!
  // Log.info("Sending Hello World to the cloud!");
  // Particle.publish("Hello world!");
  // delay( 10 * 1000 ); // milliseconds and blocking - see docs for more info!

  // This captures the various messages and sets the values in retainedLogs
  DeviceInfoLedger::instance().loop();
}
Capturing a log
Back in the Particle Console, navigate to Ledger and then select the device-logging Ledger.

Select the latest instance and you will see the log output by the device.
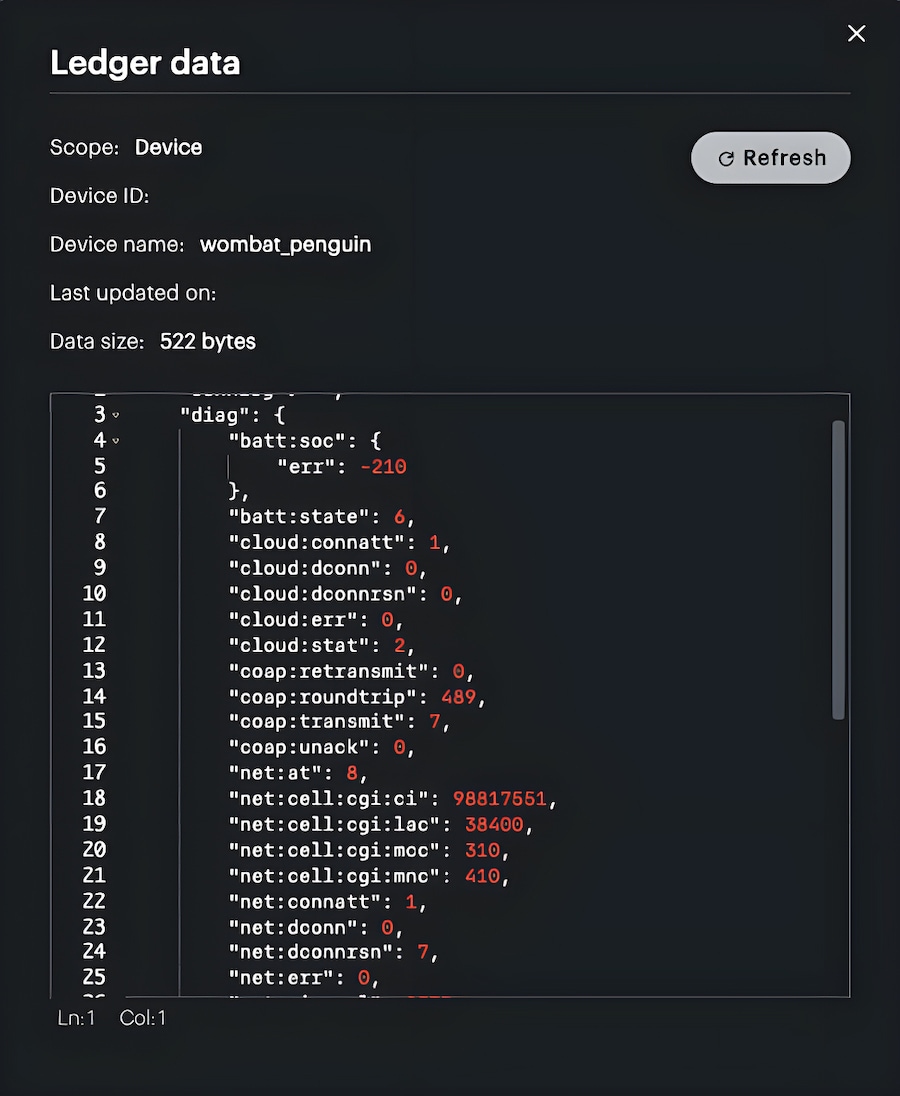
The instance will continue to be updated, giving you relevant information about how that particular device is performing.
Conclusion
By utilizing Particle’s Device Ledger, your company can gain remote access to detailed logging and device metadata, enabling faster troubleshooting and resolution when field issues arise. This scalable solution enhances business operations by reducing costs and saving time, ensuring you deliver an exceptional user experience to your customers.
Ledger & Logic
Take action with your IoT data today.
